
In 2024, How To Bypass iCloud By Checkra1n Even On Apple iPhone 8 Plus If Youve Tried Everything

How To Bypass iCloud By Checkra1n Even On Apple iPhone 8 Plus If You’ve Tried Everything
Since iOS 12.3, Apple has been using its new Activation Lock feature to deter theft. This security measure requires users to enter their iCloud login information to use an iPhone or iPad previously locked by someone else.
While this is a welcomed addition for those looking to protect their device, it can also be a major inconvenience for those who have lost or forgotten their iCloud password. Checkra1n is a new tool that allows users to bypass iCloud activation without entering any login information. You will learn in this post how to use Checkra1n iCloud bypass to unlock your Apple iPhone 8 Plus or iPad.
Let’s get started!
Part 1: What is Checkra1n?
Checkra1n is a jailbreak tool that allows you to jailbreak your Apple iPhone 8 Plus or iPad running iOS 12.3 and up. As part of the jailbreak tool team, it is one of the most popular jailbreak tools. Checkra1n is a semi-tethered jailbreak tool, meaning you will need to re-jailbreak your device each time you reboot it. It is, however, a very reliable jailbreak tool that is easy to use.
Checkra1n is the only jailbreak that allows for the BFU (Before First Unlock) acquisition of locked devices with an unknown passcode. It means that if you have a locked iPhone that you don’t know the passcode for, you can still use checkra1n to jailbreak it and access the data.
Additionally, checkra1n does not require you to sign the jailbreak IPA file (using AltStore or the Developer Account at Apple), which makes it much easier to use. Overall, checkra1n is a powerful tool that you can use to access data on locked iPhones, even if you don’t know the passcode.
Pros
- The tool doesn’t require tech skills
- It supports iPhones, iPads, and many other devices
- Supports a wide range of hardware platforms
- It is not possible to exploit remotely
Cons
- Jailbreaking older devices is limited
- A reboot won’t save them
Part 2: How to Bypass iCloud Activation Lock with Checkra1n?
You may consider using Checkra1n if you are looking for a method to bypass the iCloud activation lock. You can remove the iCloud activation lock from your Apple iPhone 8 Plus or iPad using this method.
1. How to Jailbreak an iOS Device with Checkra1n?
Step 1: Enter the BIOS settings after the computer has rebooted.
Step 2: Go to Boot Menu and select the jailbreak USB drive you just created.
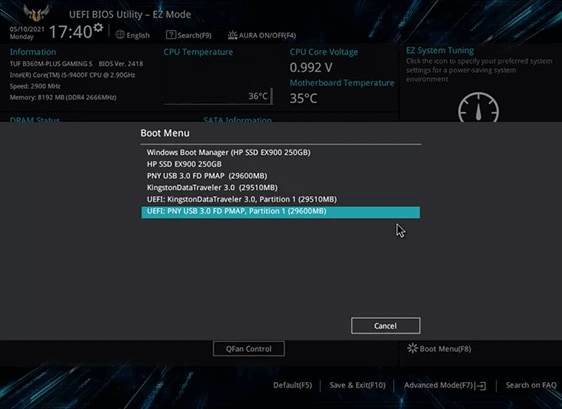
Step 3: Plug your iOS device into the PC and click [Start].
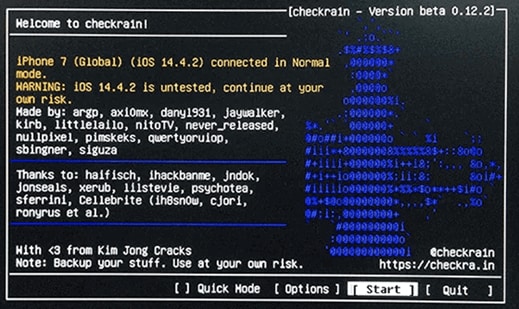
Step 4: The software may inform you that your iOS version is not tested. Follow the steps below to enable the Start key on the iOS device at risk if you are ready to jailbreak.
Follow these steps to enable the [Start] key:
- Select [Options].
- Ensure that Untested iOS, iPadOS, and TVOS versions are checked.
- To return to the homepage, click [Back].
- To begin the jailbreaking process, click [Start].
Step 5: You will be shown how to enter DFU mode on the Apple iPhone 8 Plus device. Follow the instructions step by step.

Step 6: You have successfully jailbroken your device.
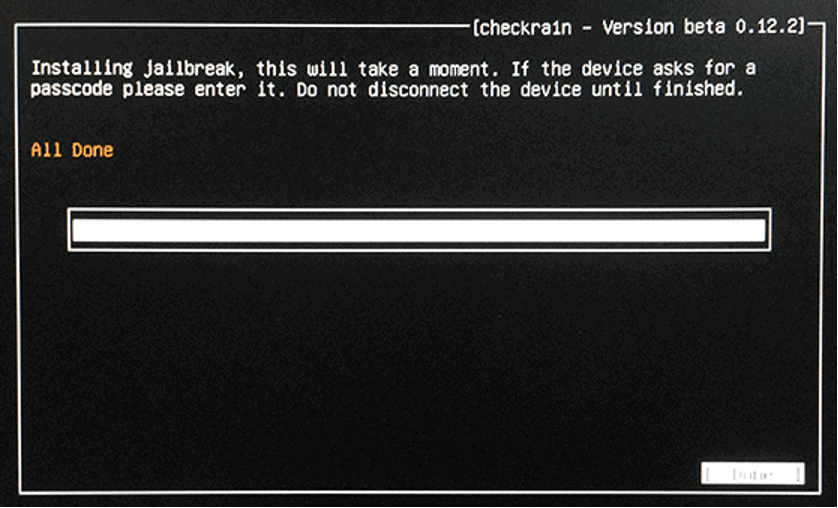
Since Cocosenor bypass Tuner now uses checkra1n 0.12.2 to help jailbreak, it won’t be able to jailbreak iOS 14.5.
2. How to Bypass iCloud Activation Lock with Checkra1n?
The next step is to figure out how to bypass iCloud with Checkra1n iCloud Bypass. We will show you how to use the method on a Mac. The Checkra1n installation process has a few technical aspects, but if you follow the steps, you shouldn’t have any problem.
Step 1. Download Checkra1n from the official website.
Step 2. Using the Terminal app, install brew and usbmuxd by entering the following commands:
- /usr/bin/ruby -e “$(curl -fsSL https://raw.githubusercontent.com/Homebrew/install… )”
- brew install usbmuxd
Step 3. Launch Checkra1n once those have been installed.
Step 4. Follow the instructions to jailbreak your Apple iPhone 8 Plus by connecting it to your computer.
Step 5. The following command will create a tunnel from Port 2222 to Port 44 (or 22 if this fails) using USBmuxd’s built-in iProxy tool:
- iproxy 2222 44
Step 6. Enter the following command in a new Terminal window by pressing Command + T:
- ssh root@localhost -p 2222
Step 7. To move the setup file and patch the system, enter the following commands:
- mount -o rw,union,update /
- mv /Applications/Setup.app /Applications/Setup.bak
- rm -rf /Applications/Setup.app
Step 8. Lastly, enter these two commands to clear any springboard processes and clear the setup file’s cache:
- uicache -all
- Killall backboardd
Checkra1n will bypass the iCloud Activation Lock after you enter the last command.
Using the Terminal app and entering many unfamiliar commands may be intimidating for some people, but if you copy exactly what we’ve shown you, you’ll be fine.
Part 3: Easy Tool for iCloud Activation Lock
Dr.Fone - Screen Unlock
It is possible to bypass the iCloud activation lock with a tool called Dr.Fone - Screen Unlock. This powerful tool can bypass the iCloud activation lock on any iOS device, regardless of the version of iOS.
Here’s how to use Dr.Fone - Screen Unlock to bypass the iCloud activation lock:
Step 1. Choose Screen Unlock from Dr.Fone after installing the program.

Step 2. Click on “Bypass Activate Lock.”
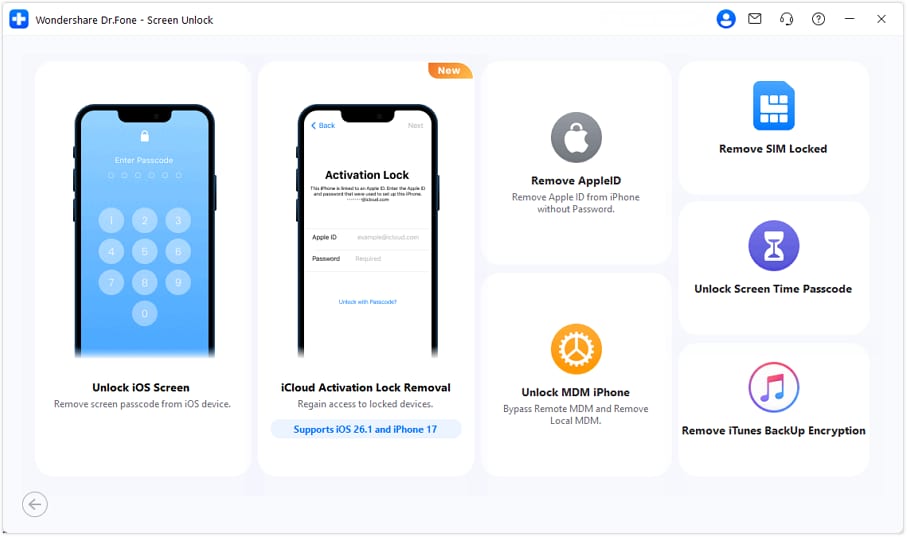
Step 3. Please select the “Start” button for the next steps.
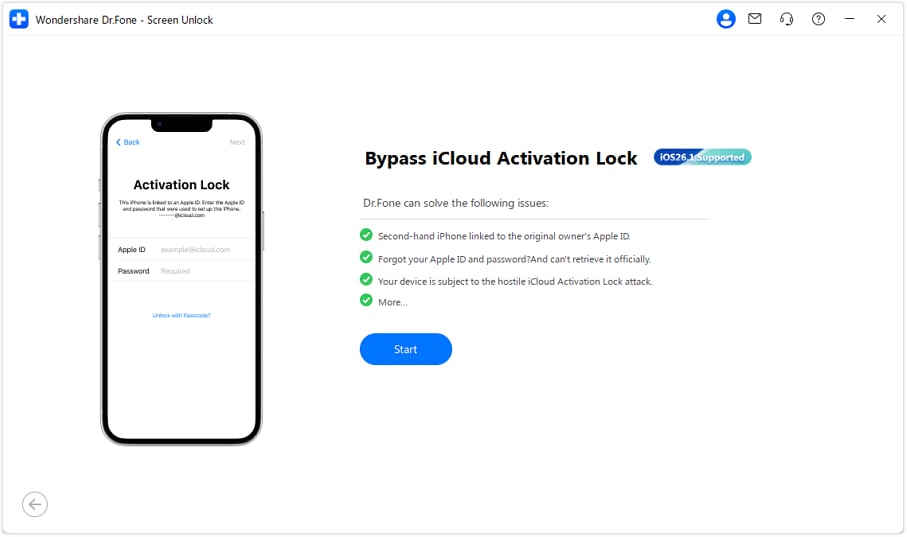
Step 4. Please confirm which device you have.
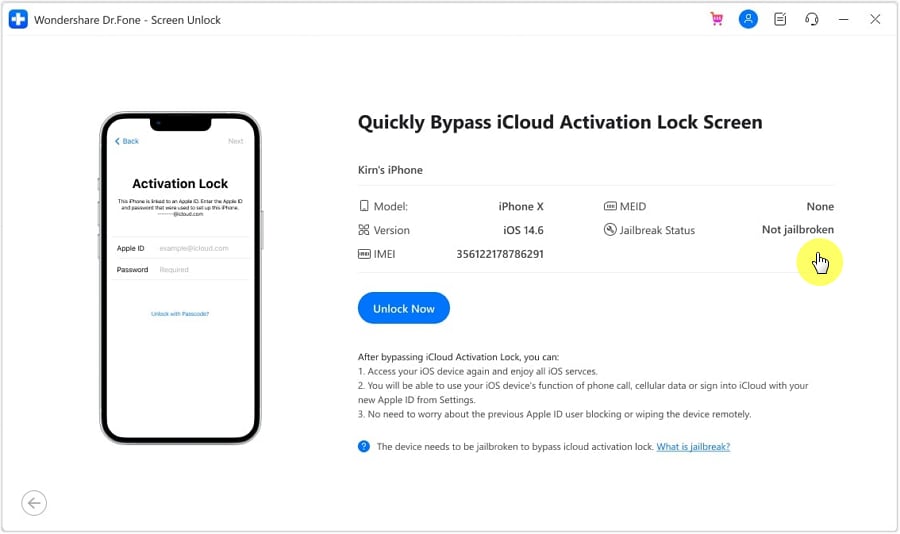
(For GSM devices, you can enjoy all functions)
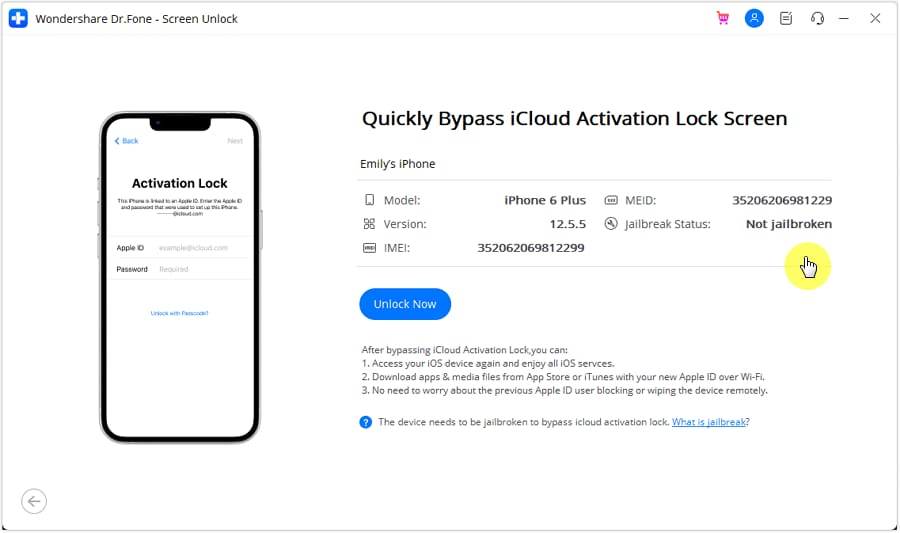
(For CDMA devices, some functions will be limited, so you cannot use them anymore.)
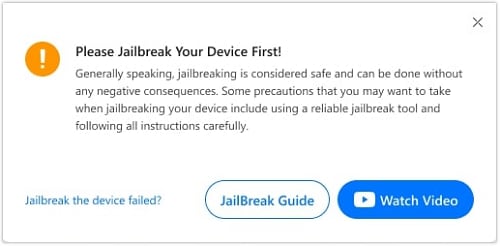
Step 5. Do you jailbreak your device? If not, you can do our jailbreak guide for this step.
Step 6. Please wait for a minute, and the process will be over.
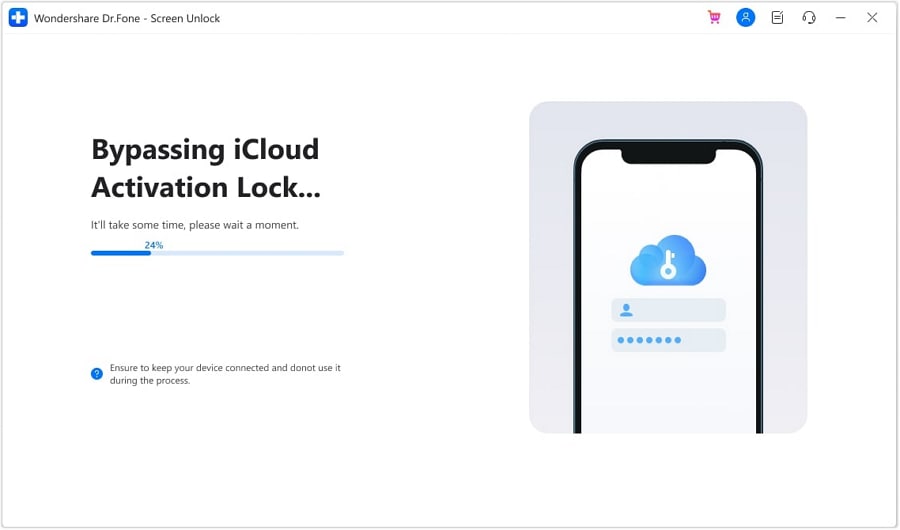
Step 7. Congrats, the iCloud activation lock is bypassed completely.

You can now access and use your Mac without any activation lock. In addition to bypassing the iCloud lock, your new Apple ID is compatible with your cellular network or iCloud.
Conclusion
Many requirements exist to remove the iCloud Activation Lock without a password. With WonderShare-Screen Unlock, you can remove your Apple ID and password associated with the iCloud Activation Lock. With this easy-to-use tool, you can remove the lock screen from your phone without losing any data. Any other suggestions you have to fix this issue would be greatly appreciated!
How to Factory Reset iPad or Apple iPhone 8 Plus without iCloud Password or Apple ID?
If you are an iPad or Apple iPhone 8 Plus owner and are looking to reset your iPad or Apple iPhone 8 Plus without knowing the passcode, you do not need to worry anymore. Most gadget owners already know how to factory reset their phones. But in cases where you have forgotten your Apple ID password or passcode and want to reset your iPad or Apple iPhone 8 Plus, it can be done via various ways and techniques. Here, we shall discuss a few of them.
In this article, you shall find multiple ways by which you can effectively factory reset iPad or Apple iPhone 8 Plus without iCloud password and get a clean slate to work on. A factory reset will wipe all the data off of your iPad or Apple iPhone 8 Plus, so be mindful of that. The methods are all quite simple yet effective in producing the desired result. Without further ado, let us begin!
Part 1: How to Factory Reset iPad or Apple iPhone 8 Plus without Apple ID by Removing Apple ID?
If you wish to factory reset the iPad or Apple iPhone 8 Plus without an Apple ID password or iTunes, one simple way to do it is via third-party application software. A quite wonderful tool in this regard is the Dr.Fone - Screen Unlock tool. It lets its users remove multiple types of locks from screens on several different devices. Using an external tool saves users from various kinds of troubles that may arise along the way.
The Dr.Fone program is a highly useful and recommended tool for unlocking phone screens. It supports a wide range of phone models and multiple brands, including Apple, Samsung, Xiaomi, Huawei, LG, etc. Users can easily remove screen locks of multiple kinds. In addition to that, Dr.Fone also:
- It saves a lot of time and effort for the users and does its job quickly.
- Supports many brands and all the latest versions of iOS and Android.
- Protects the data of consumers, making it a trusted source worldwide.
- It is relatively easy to use, with a user-friendly interface.

To factory reset the iPad or Apple iPhone 8 Plus without Apple ID using Dr.Fone, install the program on your computer, and proceed as mentioned below.
Step 1: Launch and Connect the Program to iPad or Apple iPhone 8 Plus
Launch the Dr.Fone Screen Unlock app on your computer and connect your iPad or Apple iPhone 8 Plus with the help of a data or a USB cable.
Step 2: Choose Option
On the main interface of the program, you will see various options to choose from. Click on the “Screen Unlock” button visible there.

Step 3: Select Unlock Option
On the next screen, you will see multiple options. Choose the “Unlock Apple ID” one.

Step 4: Establish a Trusted Connection
Now, tap the “Trust” button on your iPad or Apple iPhone 8 Plus to establish a trusted connection with the computer to proceed further.
Step 5: Reset iPad or Apple iPhone 8 Plus
Then, on your computer screen, click on “Unlock Now.” Confirm the action on the appearing dialogue box. Next, follow the instructions visible on the screen to reset your iPad or Apple iPhone 8 Plus.

Step 6: Remove Apple ID
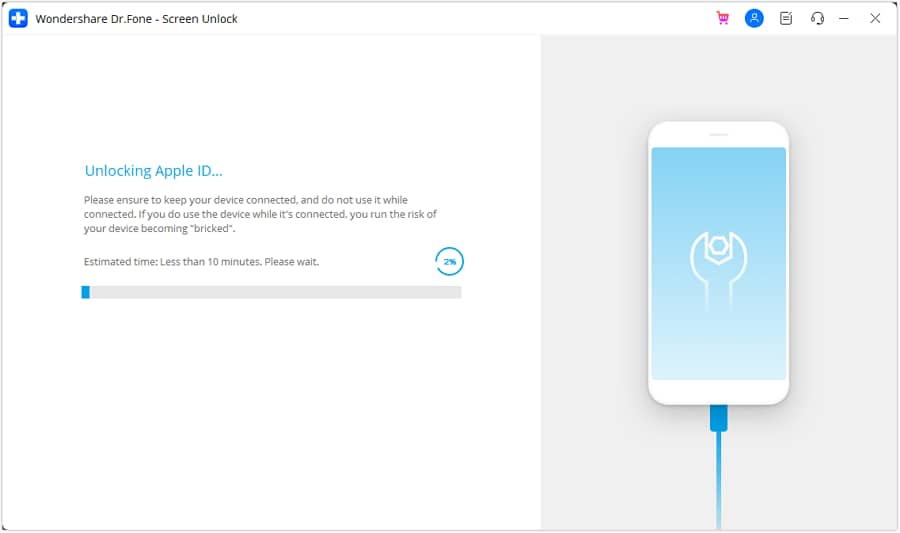
Dr.Fone will begin the process of unlocking your iPad or Apple iPhone 8 Plus. Do not disconnect the iPad or Apple iPhone 8 Plus during this process. Once the process is completed, reboot your iPad or Apple iPhone 8 Plus, and you shall be able to sign in with a new Apple ID.

Part 2: Factory Reset iPad or Apple iPhone 8 Plus without iCloud Password
In case you are asking yourself if it is possible to reset your iPad or Apple iPhone 8 Plus without an iCloud password, the answer is yes. If you want to learn how to factory reset an iPad or Apple iPhone 8 Plus without an iCloud password, an easy way of doing so is with an iTunes or Finder.
For Mac users with macOS Catalina 10.15 or later, they can complete the process with Finder’s help. Windows users and macOS users with older versions can use iTunes. Before restoring the iPad or Apple iPhone 8 Plus without an iCloud password, you are required to put it into Recovery mode. For that, you need to follow the steps provided as follows.
Step 1. Turn off your iPad or Apple iPhone 8 Plus
- On an iPad or Apple iPhone 8 Plus with Face ID: Make sure your iPad or Apple iPhone 8 Plus is not connected with your computer. Press and hold the Top and Volume Down button to allow the power slider to appear on the screen. Drag the slider to turn off the Apple iPhone 8 Plus device.
- On an iPad or Apple iPhone 8 Plus with Home Button: Make sure your iPad or Apple iPhone 8 Plus is not connected to a computer. Press the Side or Top button to allow the power slider to enumerate on the screen. Once it is done, drag the slider to turn off the Apple iPhone 8 Plus device.
Step 2. Enter Recovery mode
- On an iPad or Apple iPhone 8 Plus with Face ID: Connect your device to a computer. Hold the Top button for leading into the recovery mode while connecting it with the computer.
- On an iPad or Apple iPhone 8 Plus with a Home button: Connect your iPad or Apple iPhone 8 Plus to your computer. Keep holding the Home button while connecting it with the computer until the recovery mode screen appears on the front.
Step 3. Open iTunes or Finder on the computer
Open iTunes and access your iPad or Apple iPhone 8 Plus through the iPad or Apple iPhone 8 Plus’s icon present on the screen’s upper-left corner. With Finder on Mac, locate your iPad or Apple iPhone 8 Plus in the sidebar of its window. Tap it.
Step 4. Restore your iPad or Apple iPhone 8 Plus and set it up
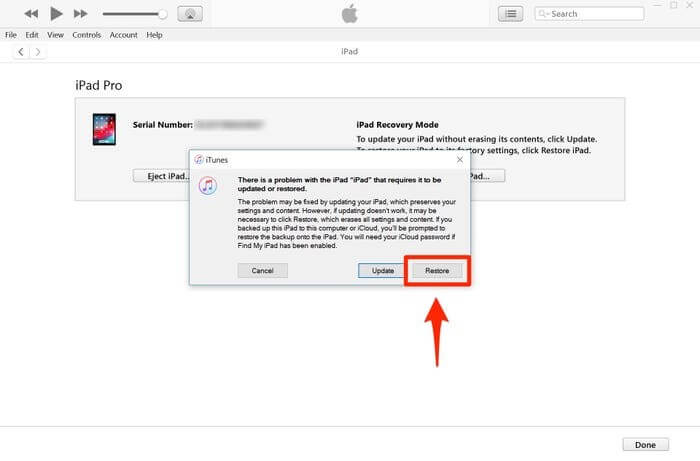
The screen displays an option of ‘Restore’ or ‘Update’ for the iPad or Apple iPhone 8 Plus. Tap on the option of ‘Restore’ to let the platform download the software into the iPad or Apple iPhone 8 Plus within the recovery mode. Then set it up as a new device.
Part 3: How to Reset iPad or Apple iPhone 8 Plus without Apple ID via the Settings App?
Another way of resetting your iPad or Apple iPhone 8 Plus is via the Settings app present on your device. You can unlock a disabled iPad or Apple iPhone 8 Plus or remove all data by executing a total wipe of the iPad or Apple iPhone 8 Plus using Settings. However, before starting, please ensure that your iPad or Apple iPhone 8 Plus is connected to the internet and the “Find My iPhone” feature is disabled on it. You will also need to know the passcode of your iPad or Apple iPhone 8 Plus to proceed with this method.
Once you have done all of that, follow the steps given below.
- Open “Settings” on your iPad or Apple iPhone 8 Plus.
- Go to “General.”
- Navigate to the “Reset” option and click on it.
- Select the “Erase All Content and Settings” option.
- Type in your passcode to confirm and proceed. This will wipe all the data on your iPad or Apple iPhone 8 Plus.
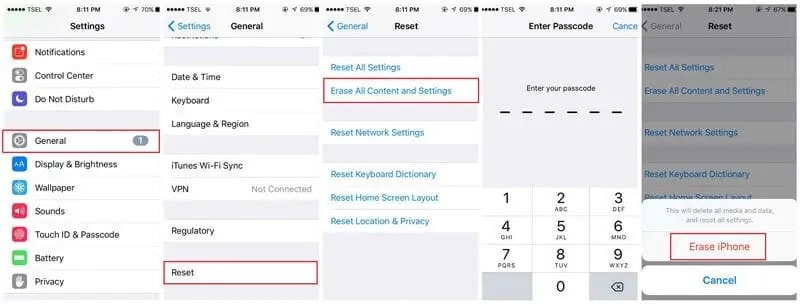
Based on the version of your iOS, you might be asked to enter your Apple ID password too. It will also ask for the Apple ID password if the “Find My iPhone” feature is enabled on your device. Hence, the process will not be successful without it, and your iPad or Apple iPhone 8 Plus will go to Activation Lock. Therefore, Dr.Fone is a simple, recommended, and reliable way of resetting the iPad or Apple iPhone 8 Plus without an Apple ID, saving much of the troubles.
Conclusion
There can be multiple reasons for resetting your iPad or Apple iPhone 8 Plus. Now you know how to factory reset the iPad or Apple iPhone 8 Plus without Apple ID. You can follow any of the above-mentioned methods to get the desired results as best suited to your needs. Some might work, and some might not. The Dr.Fone – Screen Unlock tool is recommended, as it is the most efficient among all the other methods. Try it to get proficient outcomes.

Easy Tutorial for Activating iCloud on Apple iPhone 8 Plus: Safe and Legal
Any iOS device needs iCloud to function properly. In addition to storing and backing up your contacts, photos, passcodes, and documents, iCloud is an essential part of the iOS operating system.
Activation locks prevent users from accessing iCloud. Users cannot back up their files to iCloud if the software has an activation lock. Activation locks protect your device if it is lost or stolen.
The former owner often sells their device with an activation lock enabled, which can cause difficulties for the current owner/buyer. The device may appear to be stolen by the current owner.
Fortunately, we have the best solutions for you-the five best tools for iOS 17 iCloud bypass. You can unlock the activation lock by following these simple steps.
Let’s get started!
Choosing the right tool for iOS 17 bypasses is challenging. Looking for a safe, legal, and effective way to bypass the iCloud Activation lock is exhausting. To make understanding easier, we have added pictorial tutorials and a step-by-step guide.
Check out these iOS 17 iCloud bypass tools:
1. Check M8
The best tool for bypassing the iCloud lock screen on iOS 17 is Check M8, software designed to unlock the iCloud lock screen on iOS 17.
- Step 1: Visit Check M8 website.

- Step 2: Select your computer model to find the ‘Download‘ button.
- Step 3: Run the software on your computer.
- Step 4: Connect your iOS device to your computer.
- Step 5: Tap on ‘Start Bypass‘ to start the process.
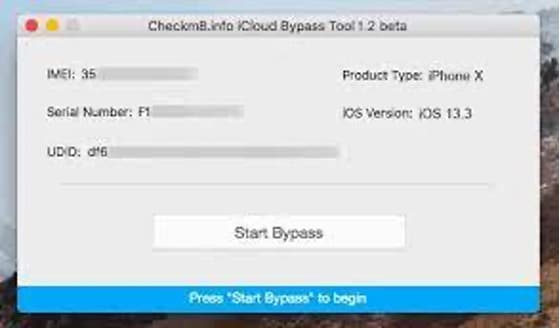
- Step 6: Wait for the bypass to complete, and you’re done!
The iCloud activation lock can be unlocked in six easy steps, right after which you should update your phone.
2. Frpfile All-In-One Tool
Bypassing iOS 17 is easy with Frpfile, and it has several other features as well. There are so many things you can accomplish with just one tool. For quick iOS 17 iCloud bypass, follow these steps:
- Step 1: Visit iFrpfile All-In-One Tool and click ‘Download‘ to install the software.
- Step 2: Run the software on your computer. Connect your device to your computer.
- Step 3: Click ‘Process‘ to start the bypass.
This free tool can simplify your work 10x, meaning you can use your phone/device to its fullest.
3. IMEI Doctor
The best alternative for bypassing iCloud in iOS 17 is IMEI Doctor. A top-notch tech team does unlock your phone/device, so you can enjoy using it. Unlocking your phone/device is worth $19.
Follow these simple steps for iOS 17 bypass:
- Step 1: Go to the IMEI Doctor website.
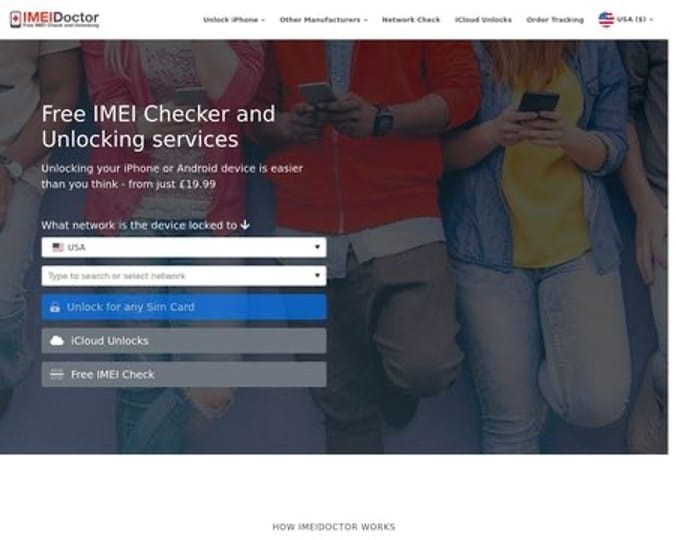
- Step 2: Select your region.
- Step 3: Type in your iCloud IMEI number.
- Step 4: Select your device and model type from the drop-down button.
- Step 5: Tap “Remove Activation Lock“.
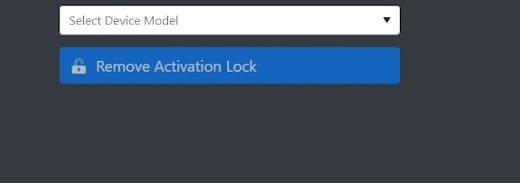
- Step 6: Process the fee for unlocking the activation lock.
4. IMEI Unlock Sim
There is some similarity between IMEI Doctor and IMEI Unlock Sim, but IMEI Unlock Sim is much better and more convenient. There is a guarantee that you will receive the results within 24 hours. Furthermore, all devices and models are compatible with the system.
Follow these steps to iOS 17 iCloud bypass:
- Step 1: Visit the IMEI Unlock Sim site.
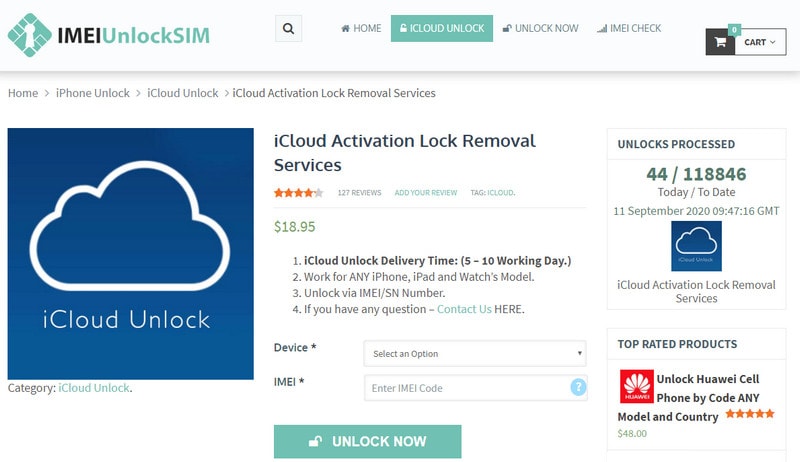
- Step 2: Select your device by clicking the drop-down button. Type the IMEI code of your device.
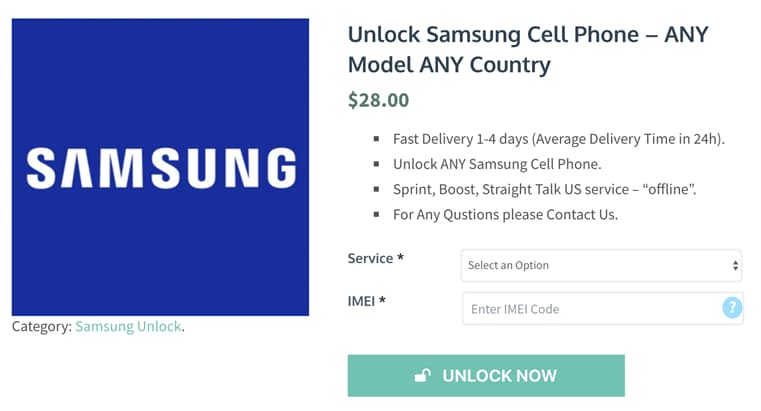
- Step 3: Click on “Unlock Now“, and process the payment.
5. Dr.Fone - Screen Unlock (iOS)
It is possible to bypass the iCloud activation lock with a tool called Dr.Fone - Screen Unlock (iOS) . For some tools, it requires jailbreak before removing the activation lock. Lucky enough, Wondershare Dr.Fone launched an activation bypass solution that doesn’t require jailbreak (running on IOS 12.0-IOS 16.6). With the help of this powerful tool, you will be able to bypass iCloud on iOS 17 Without Jailbreak.
Dr.Fone - Screen Unlock (iOS)
Remove Activation Lock on Apple iPhone 8 Pluss at Ease
- Unlock Face ID, Touch ID, Apple ID without password.
- Bypass the iCloud activation lock without hassle.

- Remove iPhone carrier restrictions for unlimited usage.
- No tech knowledge required, Simple, click-through, process.
3,981,454 people have downloaded it
Here’s how to use Dr.Fone - Screen Unlock to bypass the iOS 17 activation lock without jailbreak:
- Step 1: Log in Wondershare Dr.Fone and click Toolbox > Screen Unlock > iOS.
- Step 2: Make the Apple iPhone 8 Plus device connected to computer and choose “iCloud Activation Lock Removal”.

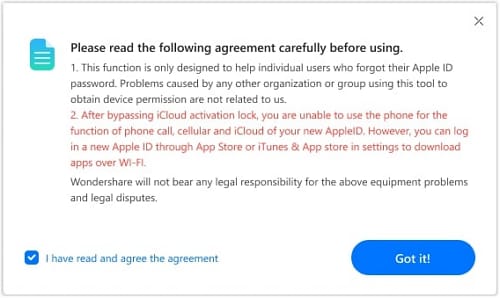
- Step 3: Tab ‘Unlock Now‘ button on the next window. When a prompt show up, read the details carefully and checkmark “I have read and agree the agreement”. Click “**Got it!**” button as well.
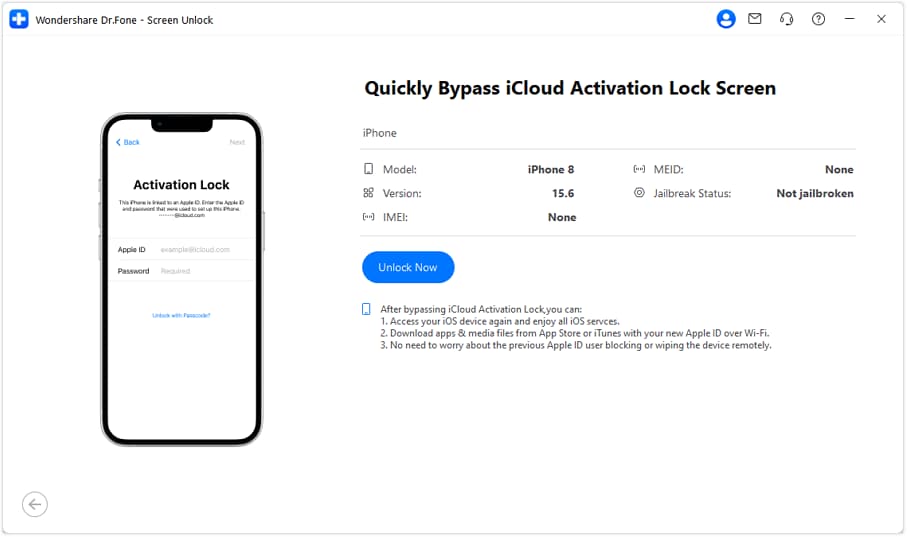
- Step 4: Put your iOS Device in DFU Mode for the first time: wait the program to send a command to the Apple iPhone 8 Plus device, and then it will restart.
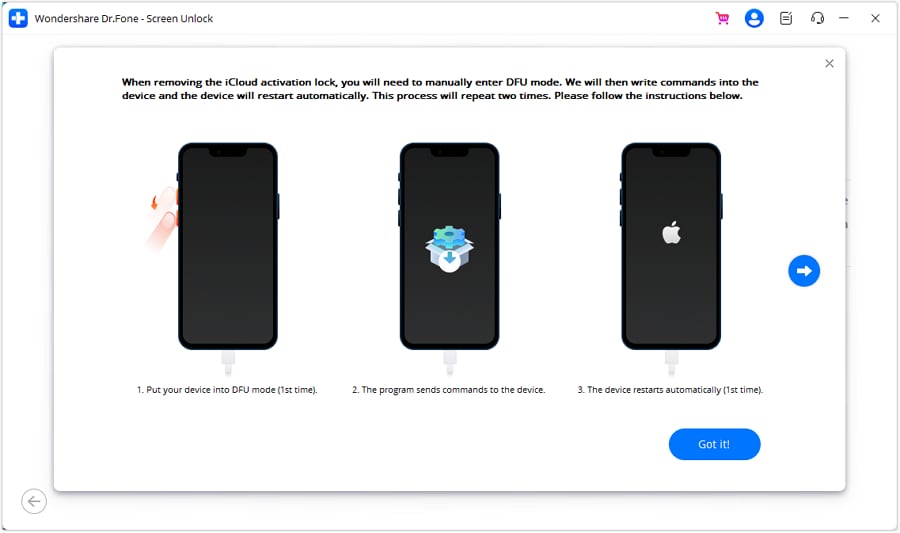
- Step 5: Put the Apple iPhone 8 Plus device in DFU mode for the second time. The program will activate the Apple iPhone 8 Plus device when it finishes.
- Step 6: Once the Apple iPhone 8 Plus device has been processed under the DFU Mode, the computer’s screen will start displaying the removal of the iCloud Activation Lock. When it’s done, click ‘Done‘.
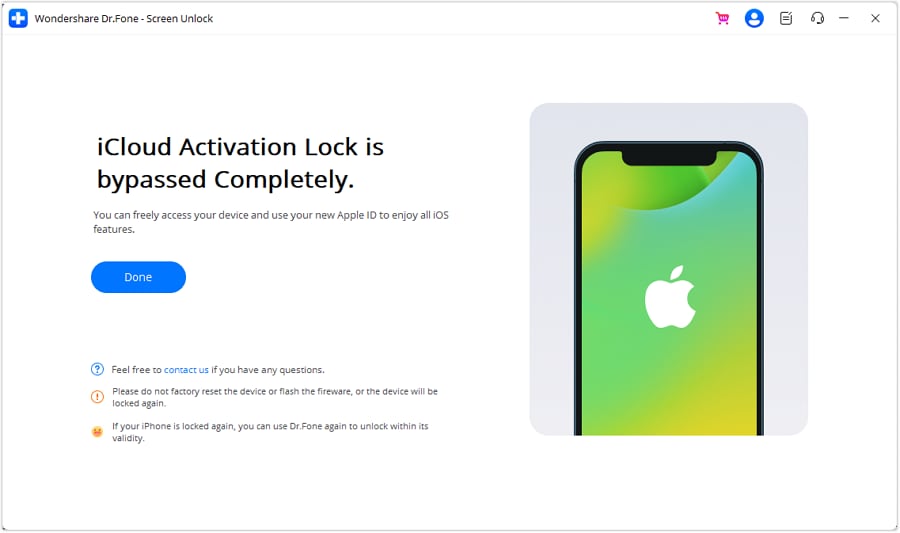
Please note that after the removal of the Activation Lock from the iPhone, it won’t be able to make or receive any calls or text messages through cellular networks.
Part 2: FAQs
1. Why do we need to bypass the iCloud activation lock?
iCloud is software that secures your backups, photos, and passcodes, allows access to Apple’s credentials, and much more. iCloud activation lock is one of the features of ‘Find Phone’ that secures your device’s personal information from falling into the wrong hands.
However, it can be trouble if you buy a second-hand iOS device. It can be difficult to access iCloud if the previous one has enabled activation lock. That’s why you need to bypass iOS 17, so you can access all the applications and secure all backups.
2. Is it legal to bypass the iCloud activation lock?
Bypassing the iCloud activation lock with or without the previous owner is legal. There are no illegal ways to unlock it. The steps and tools are all legal and safe to bypass the iOS 17 iCloud activation lock. Without bypassing the activation lock, you won’t be able to use your iOS device freely or at all.
3. What will happen after a successful bypass?
The data you previously had on your iOS device will be permanently erased as soon as iOS 17 has been bypassed. Additionally, the Apple iPhone 8 Plus device will be set up as a new one. After finishing the bypass, you can now enter all your details and start using the Apple iPhone 8 Plus device. Furthermore, you can back up all your data easily as the previous one has been deleted.
Conclusion
There is nothing more frustrating than an iCloud activation lock. You cannot access your iOS devices without iCloud. Since there are 5 incredible tools to bypass iOS 17, this issue has been resolved.
You can easily unlock anything with one of the best tools available. Lock-screen removal is made easy with Wondershare Dr.Fone - Screen Unlock (iOS) . You can conveniently bypass the lock screen without any difficulty. The tool works smoothly on iOS devices, which is the most important feature.
Also read:
- [New] In 2024, Syncing Your Presence in Real-Time TikToks
- [New] Navigating the Best Instagram Performance Insight Platforms
- [Updated] Jumpstart Earnings A Novice’ Written Guide for 2024
- How to Remove Apple iPhone 15 Pro Max Activation Lock
- How to Successfully Bypass iCloud Activation Lock from iPhone SE (2022)
- How to Track WhatsApp Messages on Apple iPhone 11 Pro Without Them Knowing? | Dr.fone
- In 2024, Bypass iCloud Activation Lock with IMEI Code On Apple iPhone XS Max
- In 2024, How to Bypass iCloud Lock on Apple iPhone 13 Pro Max
- In 2024, How to Unlock iCloud Activation Lock and iCloud Account From iPhone 8 Plus?
- Leveraging Facebook's Potential The Most Effective Video Ad Approaches for 2024
- Protecting Data While Transforming YouTube Videos Into MP3 Files for 2024
- Visual Filmmaking Aids Go Green, No Money for 2024
- Title: In 2024, How To Bypass iCloud By Checkra1n Even On Apple iPhone 8 Plus If Youve Tried Everything
- Author: Lydia
- Created at : 2025-01-30 02:00:26
- Updated at : 2025-02-01 00:38:36
- Link: https://activate-lock.techidaily.com/in-2024-how-to-bypass-icloud-by-checkra1n-even-on-apple-iphone-8-plus-if-youve-tried-everything-by-drfone-ios/
- License: This work is licensed under CC BY-NC-SA 4.0.
